Foreman & Katello 2.x Full Setup Guide - Part 3
In this final part of the Foreman & Katello setup guide I’ll finish what was planned! I’m sorry if I’m late but I had a lot of work to finish! Thanks to S. Kerr, F. Malali, P. Klassen, A. Salgado & D. De Jager for their support and feedbacks! I really appreciated your emails guys and if you check the previous guides (part 1 and 2) I corrected the mistakes.
So, this setup guide will finish with:
- Configuration of VMware and virt-who
- Configuration of Provisioning
- Provisioning of new server and KickStart configuration
- Configuration of OpenSCAP
Configuration of VMware and virt-who
In this section I’ll install all the required software for my Foreman to be able to work with a VMware instance.
First of all I’ll install the required software but before I’ll check the providers installed:
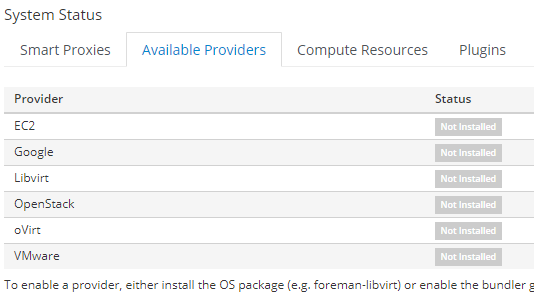
so, VMware is not present!
|
|
I move another time to Administer -> About -> Available Providers and the VMware one will be green/running:

It’s time to configure virt-who, I move to
- Infrastructure -> Virt-who Configurations
- click Create Config
I write the required data:
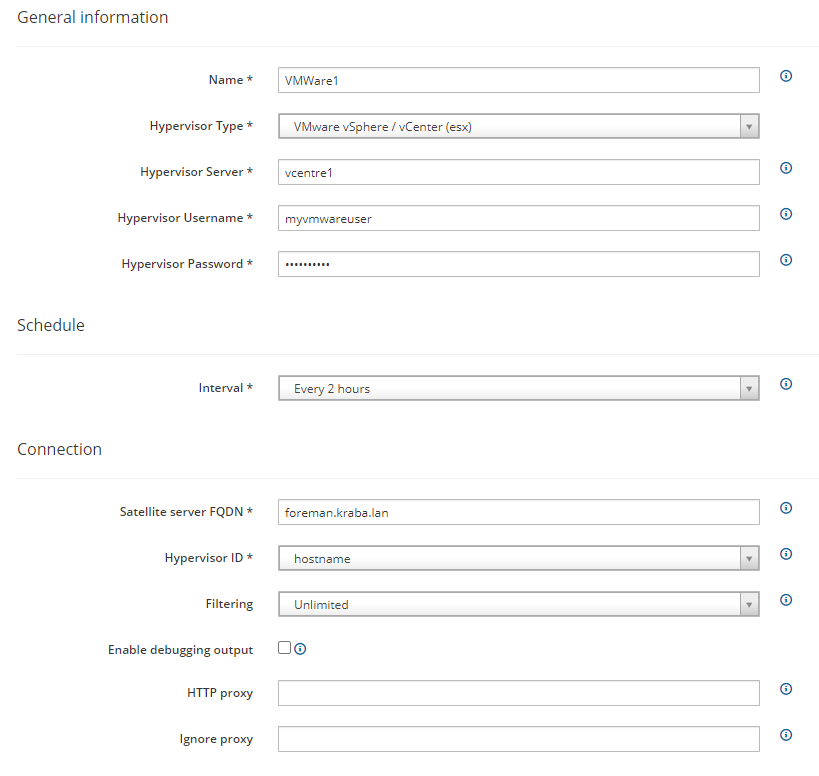
I write as Name the name I like (eg VMware), as Hypervisor Server the name of the Hypervisor on my estate and as username/password the username I use to connect/service username. I click save and Foreman will create the virt-who configuration, I move to the Deploy tab and I copy the b) step:
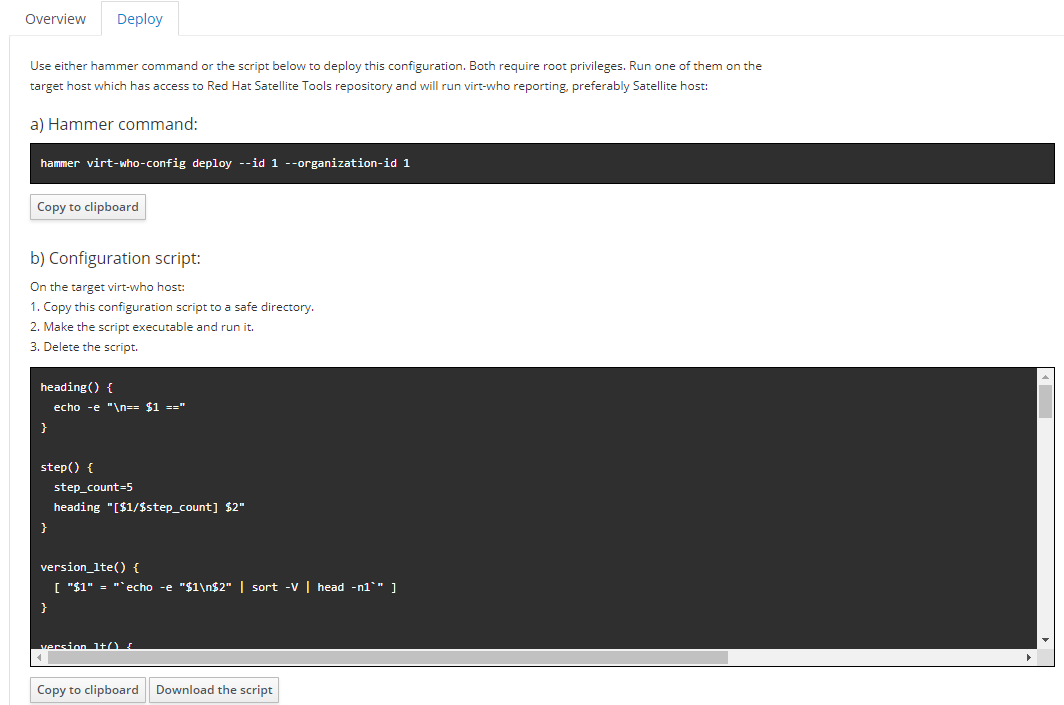
Via CLI I create the script and I run it:
|
|
and it’s done!
Now I’m ready to configure a new Compute Resource for VMware, I move to:
- Infrastructure -> Compute Resources
- Create Compute Resource
I write the required data:
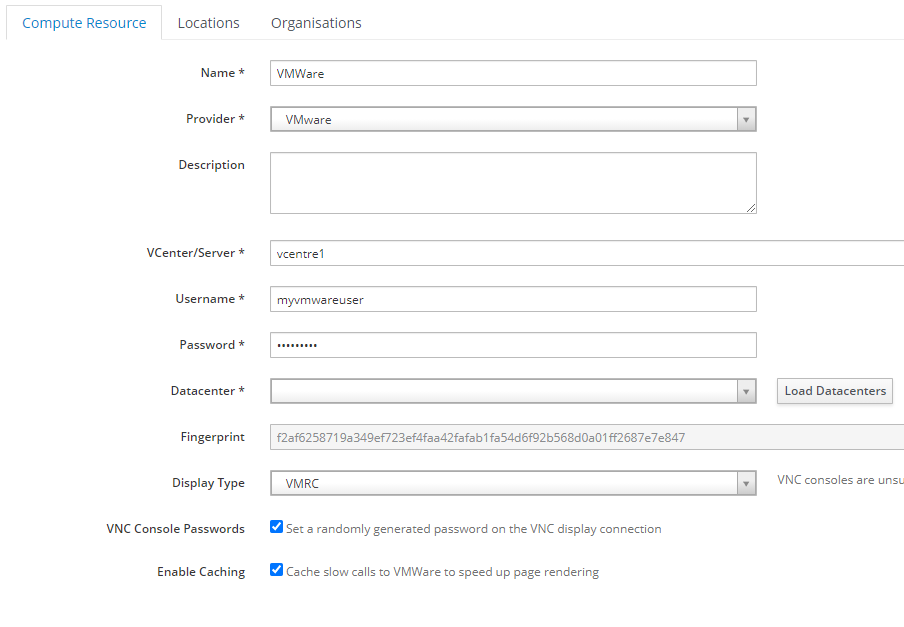
I use the same data used on my virt-who configuration, just to avoid some misconfigurations. Once I write server/username and password I’ll check if the datacenters are loading properly clicking on “Load Datacenters”. If everything is ok I’ll read the full configurations of my datacenters and I select the one I need to be loaded into Foreman.
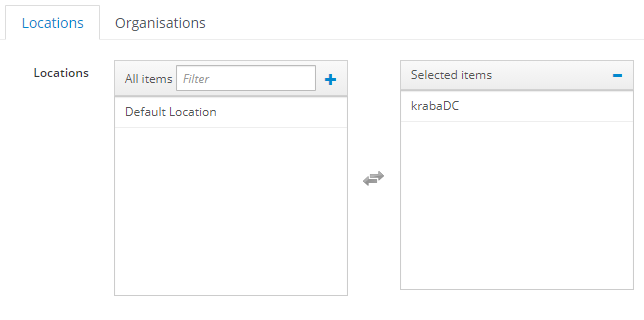
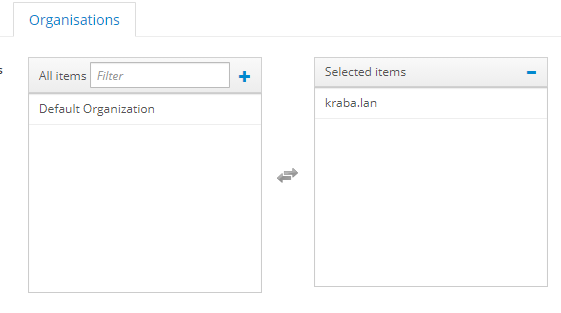
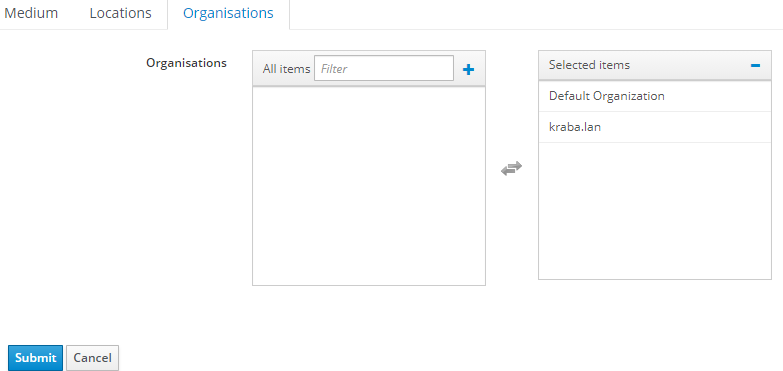
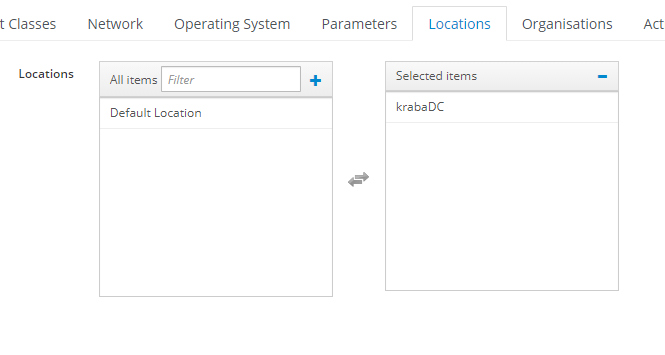
I move to Locations and Organisations tabs and I select where I want the location/organisations be set, in this case my DC (krabaDC) and my Org (kraba.lan)
After I save the configuration and a new Compute Resource for VMware1 (or the choosen name) will appears. I move to the Virtual Machines tab and I check if all my VMs are loaded properly:
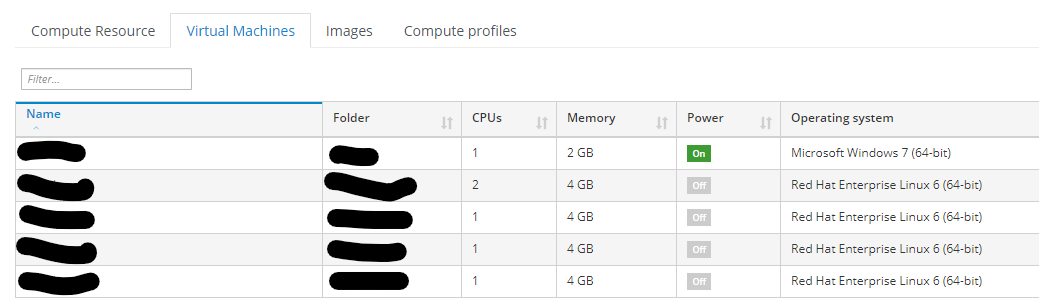
From the other tabs I can check if all images and all compute profiles (useful for provisioning) are loaded correctly.
Now I look on the right corner, I’ve 4 buttons:

Ok, before I registered some server to Foreman and they wasn’t associated to VMware, just are just registered to Foreman. Now I’ll associate the server both to Foreman and VMware and I click the “Associate VMs” button. It will match the registered Foreman VMs to the VMs present on VMware.
After a while, few seconds/minutes, the job will finish and I check on Hosts -> All Hosts if something changed:

And yes, the Power tab of my server now are green/red (based on server state - on or off) and the “Model” will be the same of my compute resource. I’m sorry but I’ve to mask the data… It will take some time to match and show the correct state or model, don’t panic if it’s not working after few minutes! Pay attention with the delete command or similar…now you could delete a server from VMware directly through Foreman!
If you’re running the supervisors with a RHEL OS, another important step is registering or associate the RHEL supervisor to the proper Activation Key/License based on your RHEL licenses plan.
Check if, after the virt-who/compute resource steps, the supervisors are present on “All Hosts” and add the license.
Provisioning of VMs
There are several steps to configure the provisioning and probably different ways to do it, mine is this one and it use a Kickstart file (I don’t use the image one, just the network one).
In order to have a working env for the provisioning I’ve to configure:
- an FTP where the ISO are stored/mounted
- an Installation Media on Foreman, it’s where Foreman download the installation files (using Foreman Smart Proxy/TFTP)
- a Subnet (at least) on Foreman, it’s the subnet used for my VMs Network
- a Computer Profile on Foreman, it’s the profile used by VMware and Foreman for the VMs
- a Partition Table on Foreman, it’s the one used by Foreman for the Kickstart Installation
- a Provisioning Template on Foreman, it’s the one used by Foreman for the KickStart installation
- an Operating System on Foreman, it’s the one who include all the previous settings
- a Host Group, it’s the group who help Foreman to save configurations
FTP configuration
Please note I’m using in this example an old RHEL 7 iso image, you can change it with your OS (CentOS, a new RHEL…) and I’m creating a repository for VMware Tools too.
I install vsftp, enable it and create a directory tree for the FTP (yes it’s not super safe but it’s just for the purpose). I’m mounting the ISO of RHEL and the ISO of the VMware Tools onto the ftp tree.
|
|
Creation of an Installation Media
I’ll use the Web GUI for the creation of the Installation Media, I move to:
- Hosts -> Provisioning Setup -> Installation Media
- Create Medium
and I write a name for the Media (eg. RHEL_7.5), the ftp path (eg ftp://foreman.kraba.lan/pub/RHEL_7.5DVD) and I add the OS Family:

If I want to use the hammer cli:
|
|
and I can see the RHEL_7.5 created and the default ones.
Creation of a Subnet
If you’re running a Windows DHCP Server you have to add all working/available subnet to Foreman to work with PXE boot. Please add this options:
Options 66 : foreman (or the hostname/DNS of your server) Options 67 : pxelinux.0
I have to add at least one subnet used by VMs to Foreman in order to work with the PXE boot. In this example I’ll use a subnet 10.10.10.0, gw 10.10.10.1 and DNS 10.10.10.254/10.10.11.254. It’s also important to check your VMware configuration and “cloning” the subnet used or at least cloning the setup of the VMs one.
I’ll use the Web GUI for the creation of the subnet, I move to:
- Infrastructure -> Subnets
- Create Subnets

I move to the other tabs and I select:
- Domains: my domain - eg. kraba.lan
- Proxies: both on foreman.kraba.lan
- Location: I’ll select the proper location - In this case I’ll select all (Default and krabaDC)
- Organisations: I’ll select the proper organisations - In this case I’ll select just kraba.lan
and save.
If I want to use the hammer cli and create another subnet, eg 10.10.11.0:
|
|
I created two different Boot Mode, one Static and one in DHCP. I prefer to use the static one, I’ll assign a static IP to my VMs. It’s just an example but I’ll revert later the Boot Mode to Static for all my subnets. The choice of the Location and of the Organization is important, imagine an estate with more than 2 locations, eg. a local one and a remote one, and each one with their own subnets. I don’t want to install a VM into a location who is not able use and configure my subnet (in VMware or at network level).
Configuration of a Compute Profile
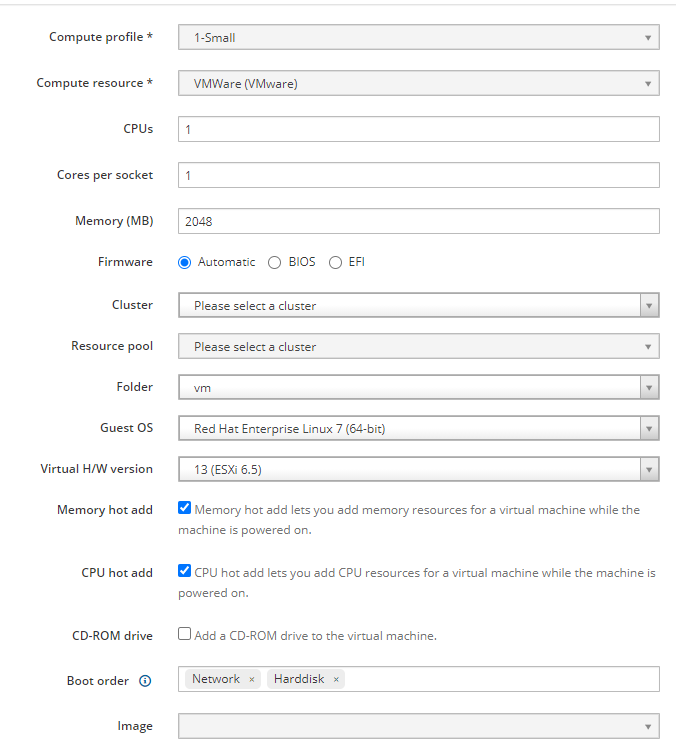
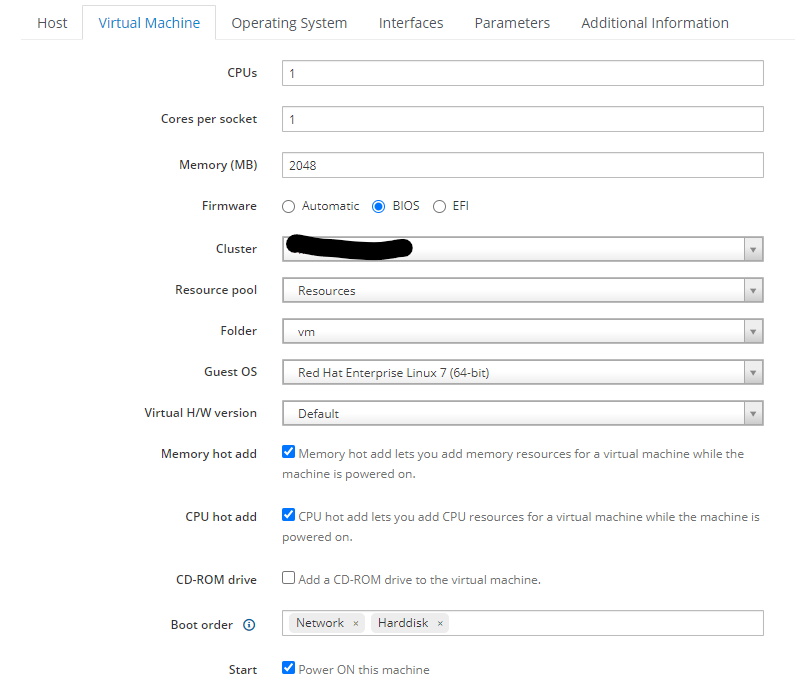
I configure now one of the VMware built-in compute profile, it’s simply the profile used by VMware for a new VM and it will save few time during the deploying. I’ll choose the basic setup for a VM and/or I can setup several different setups, eg. a 1 CPU/2Gb of ram/2CPU 4gb of ram and so on, for my VMs. In this example I modify just the “1-Small” profile but, if you want, feel free to create a new one. The setup will be:
- 1 CPU/1 Core
- 2 GB of Ram
- The proper cluster and/or the VM Folder
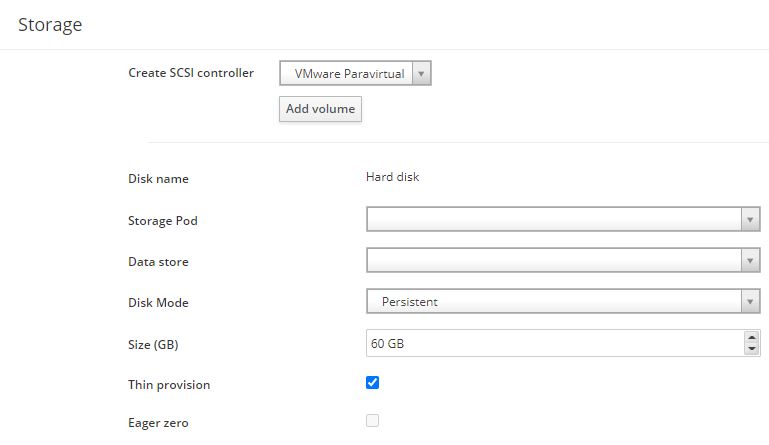
- A basic storage (60 GB) with VMware Paravirtual
- The network interfaces
and I’ll use just the web GUI, as far as i know it’s still not possible to create a compute profile via hammer CLI.
I move to:
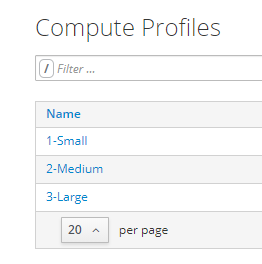
- Infrastructure -> Compute profiles
- Click on 1-Small
- Click on VMware

I start to configure it: setting up the CPU/RAM, select the proper cluster from the drop down menu, select the default Folder (eg. just VM), choose the proper OS and the VMware version of ESXi
After the cluster is selected the storage section will be available. I don’t wanna choose the Data Store of my SAN, I just write the size for an automatic setup (but I can change it during the provisioning of course), select VMware Paravirtual as SCSI controller (but..remember it’s my VMware…) and thin provision. I set up the network, I know my VMware Network named “VM Network” is using 10.10.11.x as subnet (the one I created before as Foreman subnet) for the VMs and it’s working properly with the location krabaDC.
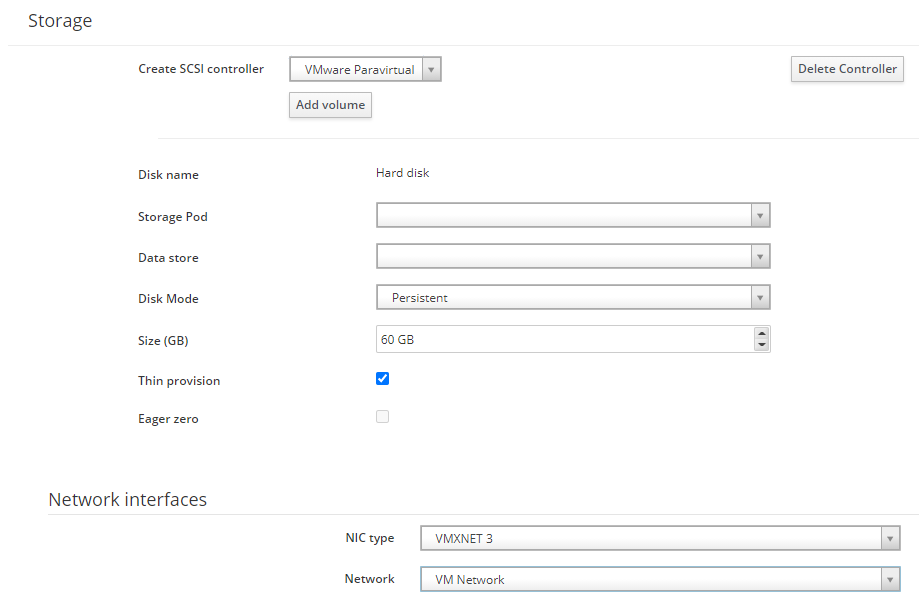
and I click “Submit” for saving. Feel free to modify/create new profiles..this is just an example.
Creation of a Partition Table
This is not a necessary step if you want to use the provided partition tables into Foreman, I prefer to have mine with 10GB of /home, swap and the other space for the / (yes it’s not the best one…it’s just an example). The kickstart file for this configuration is:
|
|
For the setup I move via web GUI to:
- Hosts -> Templates -> Partition Tables
- Find “Kickstart default thin” and click Clone on the right
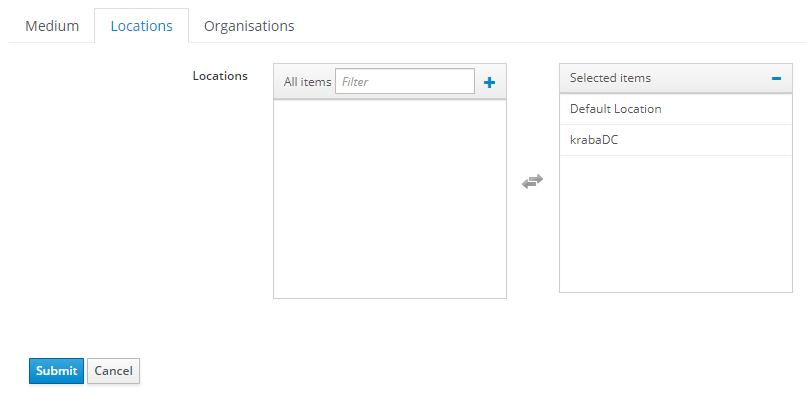
on the editor delete the code and paste the one written here, rename the template eg “Kickstart default thin krabaDC” and select the proper Locations/Organisations.
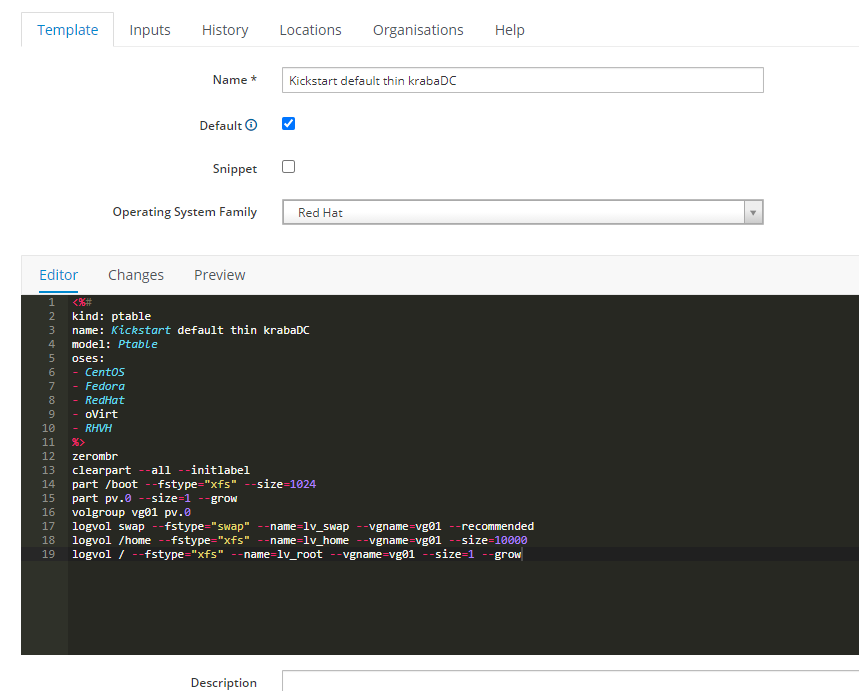
and click Submit. Done!
Creation of a Provisioning Template
I’ve my own Kickstart file, it’s nothing so smart and I deleted several section as new sw, registration to my Foreman, some agents and so on…
|
|
For the setup I move via web GUI to:
- Hosts -> Templates -> Provisioning Templates
- Find “Kickstart default” and click Clone on the right
on the editor delete the code and paste the one written here, rename the template eg “Kickstart default krabaDC” and select the proper Locations/Organisations.

and click Submit. Done!
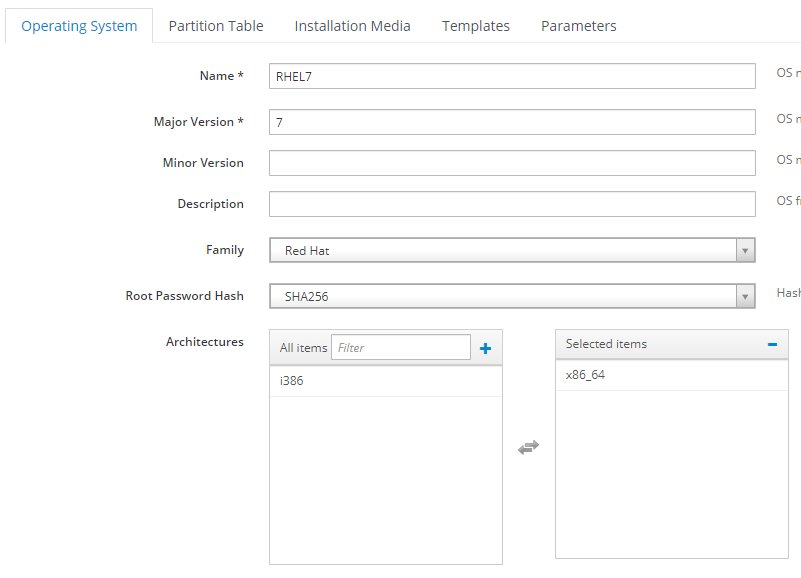
Creation of an OS
Now I create a new Operating System on Foreman, in this example I’m using the RHEL 7 previously created. For the setup I move via web GUI to:
- Hosts -> Provisioning Setup -> Operating Systems
- Create Operating System
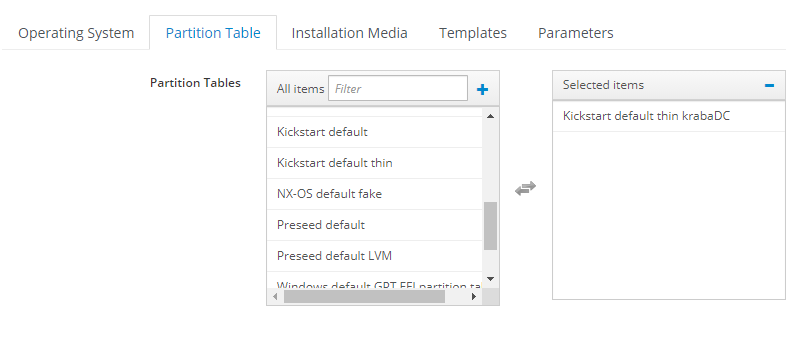
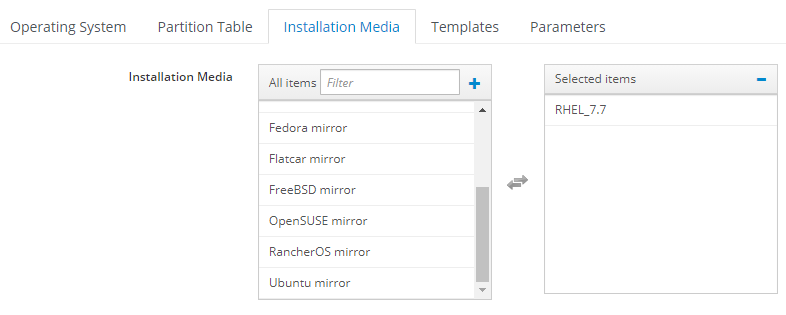
What I want is a RHEL 7 for 64bit only, who have my partition table and my installation media:
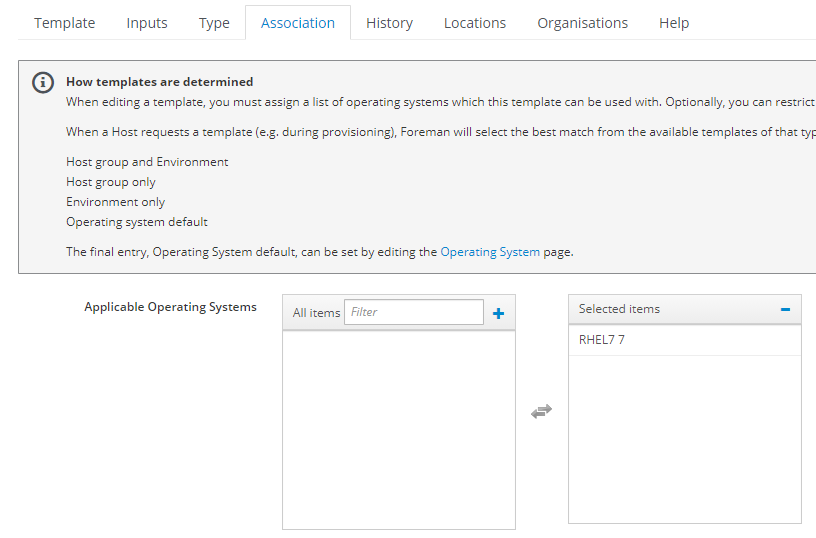
During the setup of the OS you can’t select different Templates. I’ll associate now my “Kickstart default krabaDC” to this Operating System, to do this I’ve to edit the Provisioning Template.
So, I move via web GUI to:
- Hosts -> Templates -> Provisioning Templates
- Find “Kickstart default krabaDC” and click on the name
- Move to Association and select my RHEL7 OS
- Submit
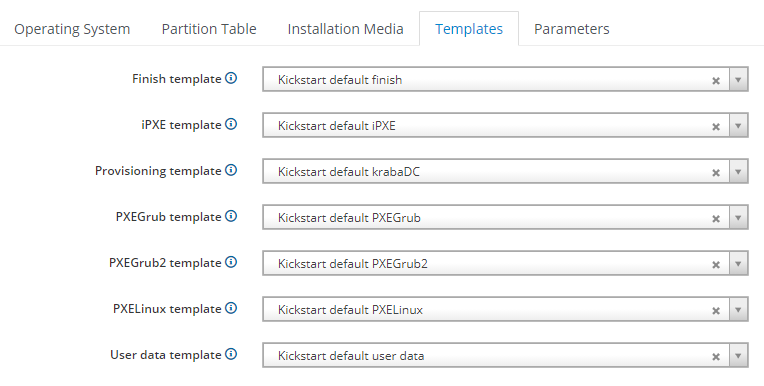
After it’s saved (double check if location/org are fine) I move back to my OS:
- Hosts -> Provisioning Setup -> Operating Systems
- RHEL 7 (or the name you have) and click on the name
- Move to Template tab
- Select from the drop down menu - Provisioning template option: KickStart Default krabaDC
Creation of a Host Group
I create an host group for my subnet 10.10.11.x, it’ll store all the useful information for creating a host. For the setup I move via web GUI to:
- Configure -> Host Groups
- Create Host Group

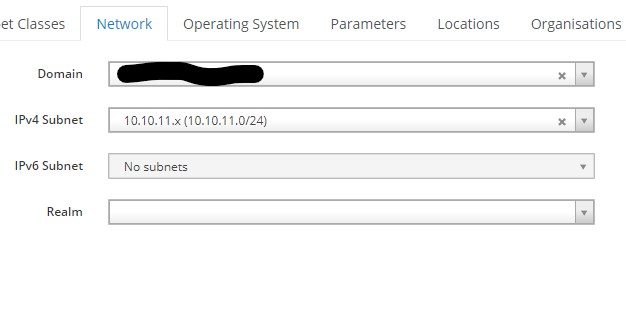
I write as name “Server on 10.10.11.x” just to remember which VMs will be stored in this group, from the drop down menu I choose the proper Lifecycle Environment, Default View, Content Source, Puppet Env & Master and where to deploy - VMware - and the Compute profile. It’s important to select the proper/correct ones. I move to the Network tab and I select my domain and the subnet (10.10.11.x ):
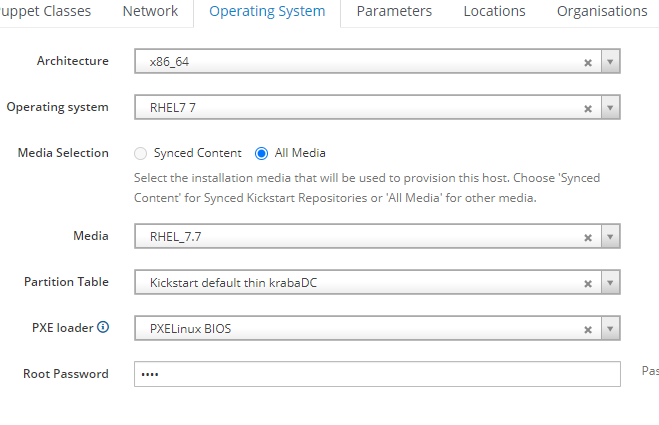
I move to the Operating System tab and I select the Architecture x86_64, the Operating System RHEL7 created earlier, the media is RHEL_7.x, the partition table created earlier (Kickstart default thin krabaDC) and I can choose a default root password for all the installations:
and I select the proper location and organization:

and Submit. I’m not using the activation keys tab, I’m using a script for registering the OS to Foreman. FINALLY I’m almost ready for deploying a VM!
Deploying a VM
I’m ready to deploy a VM named test-deplo based on RHEL 7 with the 1-Small compute profile, on subnet 10.10.11.x/VM Network and with my kickstart files. For the deploying I move via web GUI to:
- Hosts -> Create Host
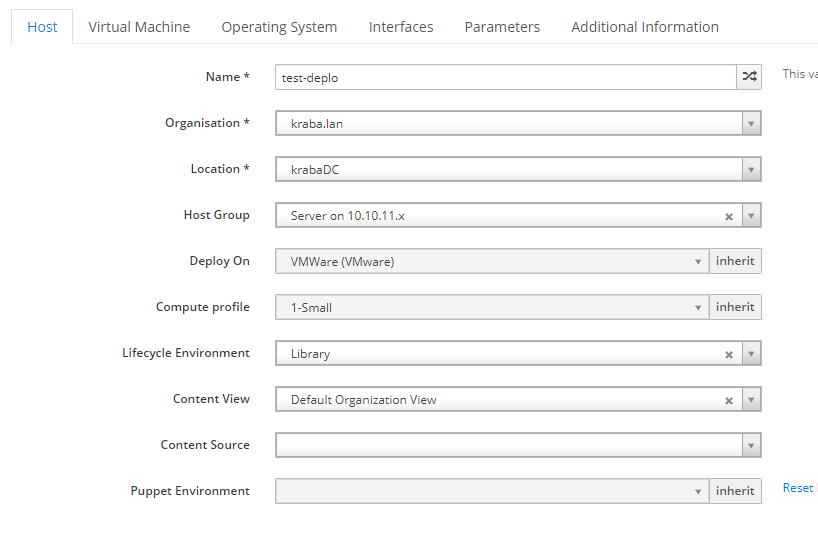
I select from the drop down menu my org/location and the host group. After few seconds Foreman will automatically select the other fields. in this configuration there is something missing (eg. Puppet Master/server) but it’s a test machine! I move to the Virtual Machine tab and the settings from 1-Small Compute Resource are loaded, I check if everything is ok and I change/select the proper Folder and the Data Store.
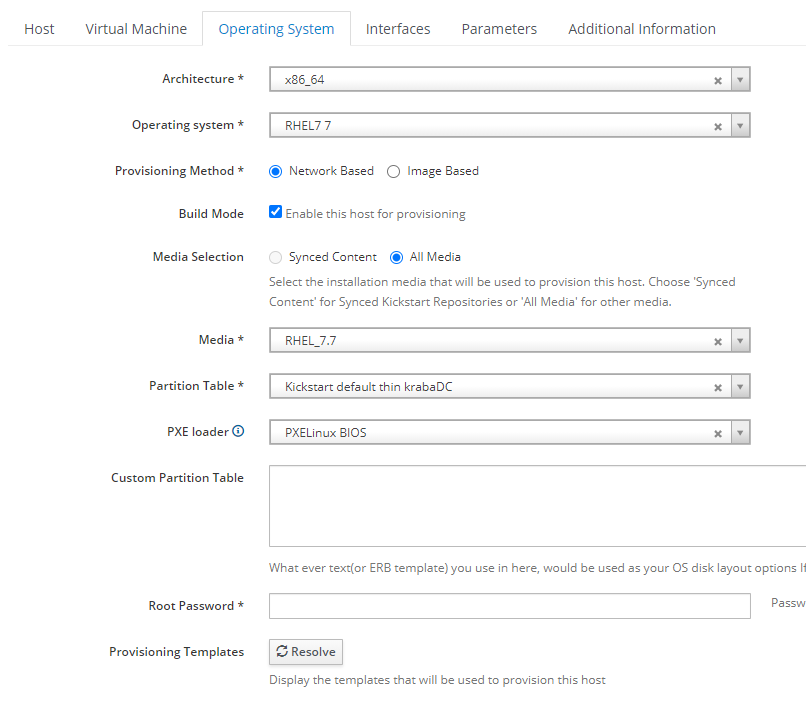
I move to the Operating System tab and I check if everything is properly loaded as from the image below. The root password is not showing but if it’s set up on Host Group it will works. If everything seeme ok it means I properly configured the Operating System and the Host group for deploying:
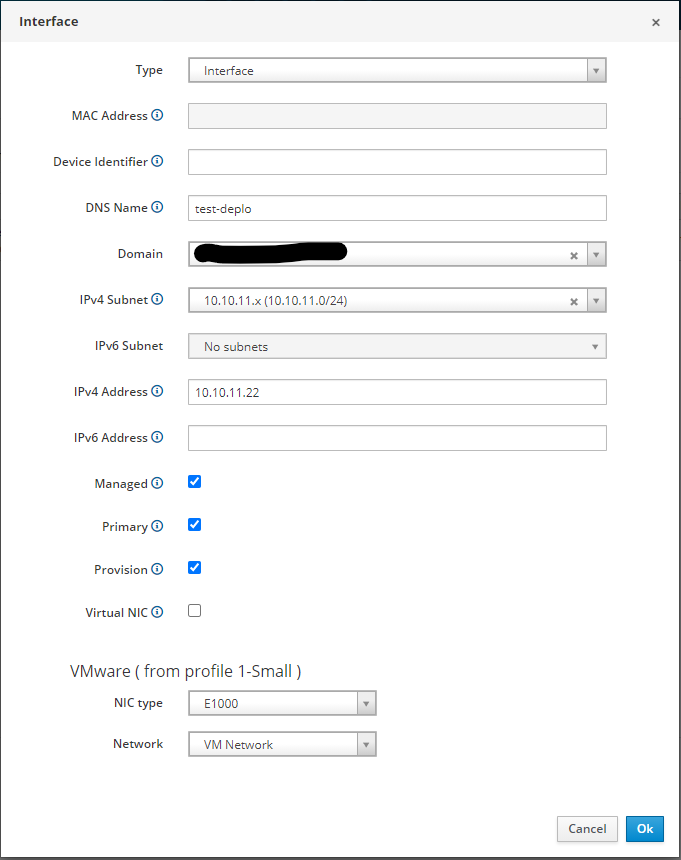
I move to the Interfaces tab, the default interface is created but it still needs to be configured, so I click on edit:

A new window appears and here I’ve just to set the proper IPv4 Address - suitable for the subnet of course - and check if the IPV4 Subnet and the Network are the correct one. In this example I used 10.10.11.x as Foreman Subnet for the 10.10.11.0 Subnet and “VM Network” is the VMware network for this range of IP/Subnet.
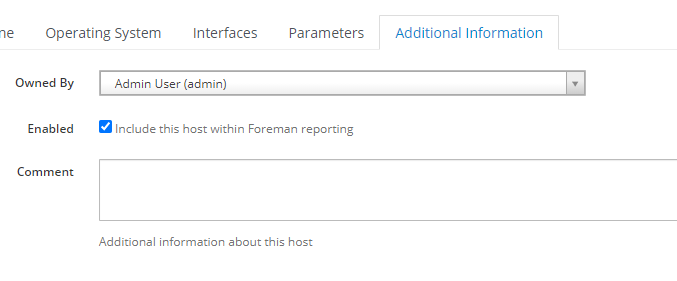
Last tab before running the deployment is the Additional Information tab, here I can write some comments or change the owner of the VMs:
And I can finally click Submit and the VM will be installed. I follow the installation via vSphere Client/Console or the standalone Console. If everything it’s working in 10/15 minutes the new VM will be up&running. The first time maybe you’ve to troubleshoot some errors or misconfigurations…
Installation of OpenSCAP
As described on the official plugin page, OpenSCAP plugin enables Foreman to receive automated vulnerability assessment and security compliance audits from Foreman hosts. You can upload SCAP compliance contents, create compliance policies out of them and assign the policies to hosts or hostgroups. foreman_openscap plugin provides three default SCAP contents, so you could start testing security compliance on RHEL6/7 and Fedora. OpenSCAP reports (aka ARF reports) will help you find vulnerabilities on your hosts and also suggest remediation plan to fix those vulnerabilities.
The installation guide it’s not very clear and the following steps helped me to have a working OpenSCAP. First of all I install the requied software:
|
|
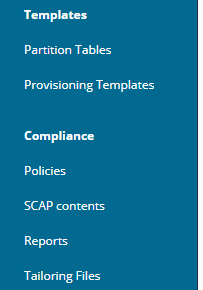
if I check on the web GUI I’ll find a new section under Hosts, named Compliance: this is the OpenSCAP one:
I import now a new Puppet Class into Foreman, from the web GUI:
- Configure -> Puppet -> Classes -> Import Environments… and import the new class
- Configure -> Puppet -> Classes -> Check if they are imported properly
I’ll create now a default OpenSCAP content:
|
|
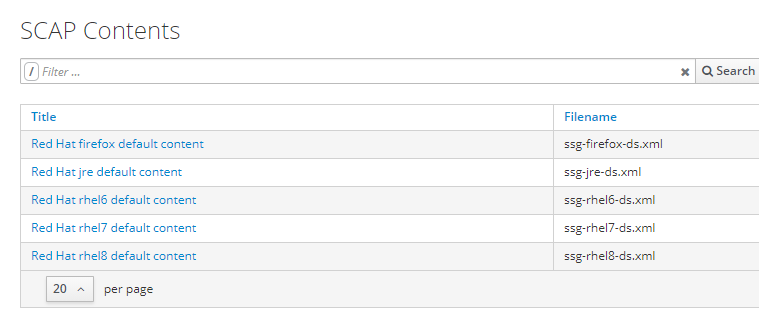
and I check via web GUI if they are present on:
- Hosts -> Compliance -> SCAP Contents
I create a new policy:
- Hosts -> Compliance -> Policies -> New Policy


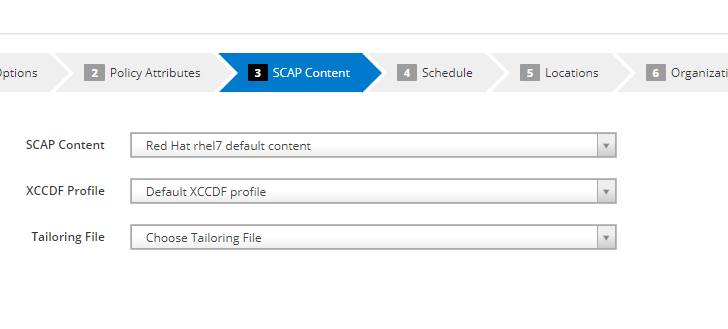
I use the proper ORG/Location as usual, feel free to use the proper for your purpose!
I’ll now configure the Puppet Classes for my installation:
- Configure -> Puppet -> Classes -> foreman_scap_client
- Smart Class Parameter tab and change some values
- Policies: check if <%= @host.policies_enc %> is present as default value
- Server: foreman.kraba.lan as default value
- Port: 9090 as default value
I’ll install now - on each client - the puppet-agent and configure it for OpenSCAP:
|
|
If the server have the proper environment on Foreman and it’s well configured, the Puppet Agent will install the rubygem-foreman_scap_client package and configure it ( /etc/foreman_scap_client/config.yaml and /etc/cron.d/foreman_scap_client_cron ).
After that I can manually run an OpenSCAP check:
|
|
and I have it uploaded on foreman. I can also run it from the web GUI:
- Hosts -> All Hosts -> Click on the host -> Schedule Remote Job -> Run OpenSCAP scan
The OpenSCAP scan will be present in:
- Hosts -> Compliance -> Reports